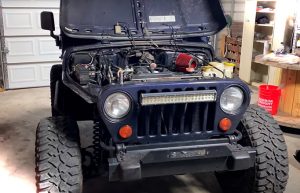
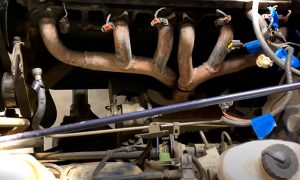
Jeep’s motor is a sure pick: it’s strong and reliable. However, it does have its flaws. For example, many drivers claim that it develops cracks, which causes a lot of trouble. First, you’ll hear a hissing sound. Then, it will get really loud and introduce a bad odor into the cabin. In other cases, the manifold breaks down and loses its factory efficiency.
So, what can you do to avoid all these problems? Well, how about replacing it with a Jeep Wrangler JK? It will boost the performance, keep the engine nice and cool, and greatly improve the way your Jeep sounds. Alright, let’s go right ahead and replace the restrictive factory manifold!
Step #1: Preparing the Jeep

I recommend taking off the cold air intake hoses, the air filter (especially if it’s an aftermarket one), and the radiator/coolant lines. Next, get rid of the alternators, engine covers (if your Jeep has them), and, of course, the exhaust pipes. Each Jeep is unique, though, which is why you should get a service manual.
Step #2: Getting the Right Equipment
With all the unnecessary components removed, here’s what you’ll need to successfully complete the job:
- A header + new gasket
- Protective gloves and glasses
- Decent-quality penetrating oil
- Sandpaper (light-grit)
- Carb cleaner
- Some clean rags
- A torque, impact, and ratchet wrench
- Fresh coolant
Step #3: Removing the Old Exhaust

Put on a pair of gloves and goggles, and remove the engine cover. It will be secured by a set of bolts – use a ratchet + socket. The heat shield, in turn, is held in place by four bolts. You’ll find them on top or the side of the shield. As for the exhaust manifold bolts, they won’t be as “compliant”. It produces a lot of heat when the engine is running, which sometimes leads to bolt fusion. So, use a healthy amount of penetrating oil to loosen them up.
Next, climb under the Jeep and spray the bolts/nuts connecting the manifold to the exhaust pipe as well, and let the oil soak for 5-10 minutes. Begin by removing the bolts holding the manifold to the cylinders, and only then “handle” the ones connecting it to the exhaust. Carefully remove the manifold from the engine bay. Oh, and get rid of the factory manifold gasket – do not use it with the new header!
Step #4: Installing a Brand-new Header
Ok, the hard part’s over. When installing the new header, all you’ll have to do is pretty much “reverse engineer” what we just did when removing the old gear. Do remember to clean the cylinder exhaust ports, though. Over time, excess carbon accumulates there. Spray some carb cleaner on a rag and wipe the ports clean. You might need some sandpaper as well. To install the header, here’s what you need to do:
- Attach the new gasket onto the cylinder head studs
- Carefully put the header onto the studs
- Connect it to the exhaust pipe below the Jeep
- Tighten the cylinder head nuts with your hands and using a torque wrench
- Put the heat shield back on
- Do the same with the engine cover, the hoses, and air filter
- Refill the radiator with fresh coolant
- Reattach the positive and negative battery terminals
And there you have it: my Jeep Wrangler best exhaust manifold replacement guide!


Add Comment