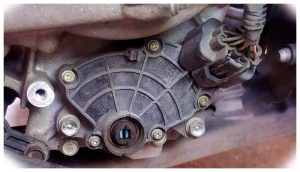
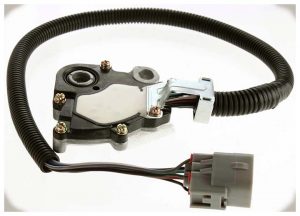
The neutral safety switch is an important component of your vehicle that prevents the engine from starting in any gear other than “Park” or “Neutral.” If your vehicle is having difficulty starting, then the neutral safety switch may be to blame and should be replaced immediately. This guide will walk you through the process of replacing a neutral safety switch in your vehicle step-by-step.
Before beginning the replacement process, consider taking safety precautions, such as disconnecting the negative battery cable and wearing protective clothing and goggles to protect yourself from any potential hazards. Also, if you feel uncomfortable doing this work independently, seek assistance from a qualified mechanic or technician with experience in replacing neutral safety switches.
Neutral Safety Switch Locating

Replacing the Neutral Safety Switch
Once you have located the neutral safety switch, you can begin removing it. To do this, first, disconnect the electrical connector from the switch. Next, remove any mounting screws to hold the switch in place and carefully pull it out of its housing. Before removal, you may need a pair of pliers or a wrench to loosen the mounting bolts and screws.
Once you have removed the old neutral safety switch, it’s time to install its replacement. First, line up the new switch with its corresponding mounting holes and secure it with screws or bolts if necessary. Ensure all connections are tight before proceeding to wire up your new switch.
Connecting the Wires and Finishing Touches

Conclusion
Replacing a neutral safety switch in your vehicle is a straightforward process that can be done safely and easily with the right tools and knowledge. Following the steps outlined in this guide should help you get the job done correctly and ensure your vehicle starts up reliably every time.
Regularly inspecting and maintaining the neutral safety switch is crucial for vehicle safety and preventing accidents caused by unintentional gear shifts during startup. By taking the time to replace a faulty switch, you are investing in your vehicle’s safety and prolonging its lifespan. Remember, if you’re ever uncertain or uncomfortable performing this task on your own, don’t hesitate to consult a professional mechanic for assistance.


Add Comment