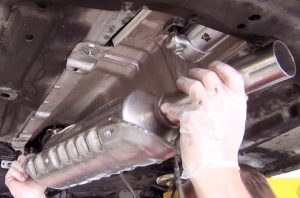
The catalytic converter is a crucial part of the exhaust system, and its main function is to reduce emissions. If your vehicle’s catalytic converter becomes faulty or needs to be replaced, it’s important to know how to remove it with safety precautions in mind. This guide will take you through the basics of removing a catalytic converter, from safety tips and necessary tools to a step-by-step guide on how to do it yourself.
The Basics of Removing a Catalytic Converter
Safety Tips and Necessary Tools
Before attempting any work on your car’s exhaust system, you must put on protective gear such as gloves, goggles and long sleeved shirts or pants for protection against burns from high temperatures and other potential hazards. It is also recommended that you place a tarp or sheet underneath the vehicle as well as above the catalytic converter when working in order to avoid scattering of small parts all over the ground.
When removing the old catalytic converter, you will need few basic tools including jack stands, jack lift with adjustable arm, adjustable wrench set (10mm-19mm), drill with metal cutting bit (recommended) and a hacksaw.
Preparation Steps Before Removal
Before you can get to the actual process of removing the catalytic converter, there are few preparation steps that must be taken beforehand:
- The engine must be cooled down to prevent burns and other injuries.
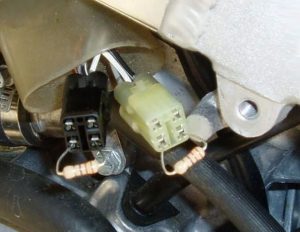
- The exhaust system must be disconnected from the ECU (engine control unit) by removing the oxygen sensor wires.
- The oxygen sensors must also be removed from the exhaust manifold prior to cutting out the old catalytic converter.
Step-by-Step Guide on How to Remove a Catalytic Converter
 Disconnecting O2 Sensor Wires from the ECU
Using your adjustable wrench set, remove all of the screws that secure the oxygen sensor wires to ECU and gently pull them apart making sure not to damage any of them in process. This will allow for easy access and clearance when you need to remove or replace your catalytic converter later on in process.
Removing Oxygen Sensors from Exhaust Manifold
Using an adjustable wrench, loosen up and remove all screws attaching oxygen sensors into exhaust manifold and carefully pull them out. It is important to be extra careful so as not to damage the oxygen sensors during this process.
Cutting Out the Old Catalytic Converter
Using a hacksaw or drill with a metal cutting bit, cut through the catalytic converter until it is free from the exhaust system and can be removed. It is important to take your time and wear protective gear while doing this job in order to avoid any potential hazards and injuries.
Installing the New One
Once you’ve cut out the old catalytic converter, you can now install the new one in its place by bolting it onto the exhaust manifold using an adjustable wrench set (again making sure not to damage any of its components). Once securely fastened, reconnect all wires and screws back in their original positions as before removal and make sure that everything is tightened correctly for optimal performance of your vehicle’s exhaust system.
Precautions for Mishandling and Other Considerations
What to Do In Case Of Mishandling?
It is important to remember that mishandling or improper installation of a new catalytic converter can have serious consequences on your vehicle’s overall performance. If you find yourself in a situation where you have mistakenly mishandled or installed your catalytic converter the wrong way, it is best to take it to a professional for help.
Improper Installation Consequences

Avoiding Common Problems
To ensure that everything runs smoothly when removing or replacing the catalytic converter, here are few tips: Check for any rust or damage before attempting any work on your car; use protective gear such as gloves and goggles; double check all screws, nuts and bolts once installation has been completed; make sure all wires are firmly connected back in their original positions before turning on the engine again; and lastly, take it into a professional if unsure of anything at any point in time during process.
Conclusion
Removing a catalytic converter requires knowledge of safety measures as well as using necessary tools with care in order not to damage any parts of your vehicle’s exhaust system. Following the step-by-step guide provided in this article will allow you to remove and replace your catalytic converter with ease, as well as prevent any potential hazards or mistakes that may occur due to mishandling of components.


 Disconnecting O2 Sensor Wires from the ECU
Add Comment